Tips for setting up a Ghost blog on Amazon AWS EC2

After a long overdue refresh, I have recently moved this blog to Ghost CMS. Overall, I have been very impressed. Ghost is easy to use as an editor, quick to make updates, and the Ghost team are constantly pushing out updates - which is great considering that it is completely open source.
In order to get started with Ghost, I currently user the AWS free tier and run this blog on a Micro instance. Considering this is the smallest instance available, I have been very impressed with the performance of this site. I also chose to go with the Bitnami Ghost stack for AWS in order to get up and running as quickly as possible.
While Ghost has been ticking away nicely, I have recently been having some serious issues with my Amazon EC2 instance and I wanted to write this article to help any others that might be experiencing the same problem! I’d also like to refer back to this in case it happens to me again.
AWS Instance scheduled for Retirement
As far as I was concerned, my blog was up and running and everything was working as expected. After about 3 months of running undisturbed, I received a warning from AWS that my “instance was scheduled for retirement due to underlying hardware degradation and that it may already be unreachable”. What!?
Sure enough, I logged in to the Amazon management console and it was down. My blog was also returning a 503 Service Unavailable error. Fortunately I was able to stop the instance and restart it again - but this meant I needed to quickly backup my blog and restore it to another instance.
Wait...you don’t back your blog up!? Yeah I know….rookie mistake!
Making a backup of your Ghost blog
There are two ways to make a backup of your Ghost blog on EC2. The first option is to create an image of your EC2 instance which you can simply use to restore from at any point in time. Think of it as a “snapshot” for the given time.
If you log into the AWS console, select Instances and then select the instance you wish to back up. Next, choose Actions -> Image -> Create Image.
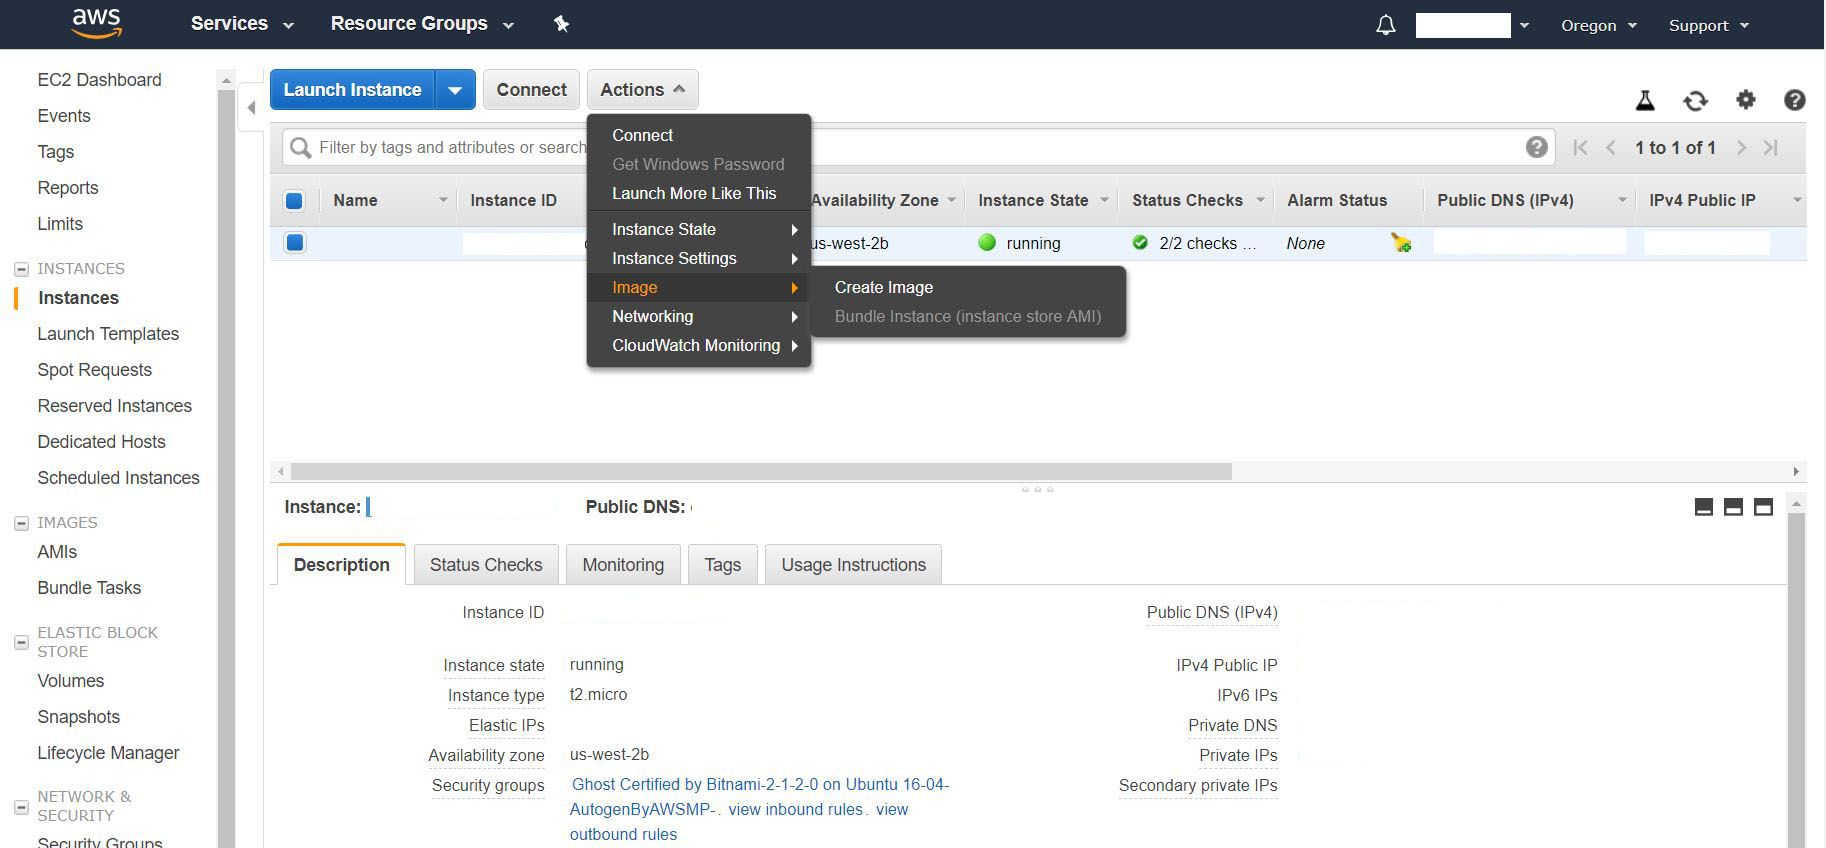
This will then create AMI under images that you can use to restore from. You can simply choose Launch Instance and then look under My AMIs to restore from your newly created image.
You could even take this a step further and automate the whole process, so that you have an up to date image to restore from at any point. Using a Cloudwatch event, you can take a scheduled snapshot of your instance. I won’t go into it in this article, as this is an article in itself - but please follow the link above for more details.
The second option is to manually backup your blog using the UI on your Ghost blog. This option is ideal if you are looking to restore to a completely clean, new version of the Bitnami Ghost image. You’ll need to start by exporting all of the content on your blog. Log into your admin interface, and head over to Labs.

Choose Export your Content, and it will download all of your posts and settings in a single JSON file.
If you have any redirects or routes set up on your Ghost blog, you can do this in the same way.

We are almost done - next you’ll need to take a back up of the design of your blog. Head over to the Design tab in your admin interface.
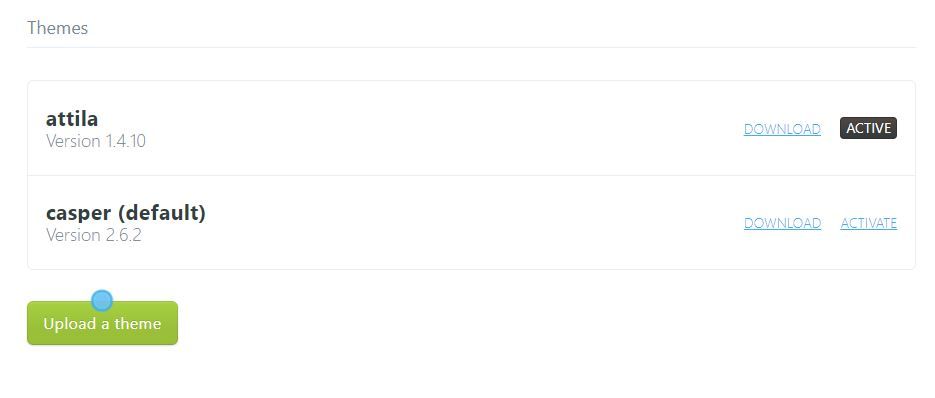
From there, click on the download link and you’ll receive a ZIP file containing all of the assets that make up the design of your site.
The best thing about the Ghost admin interface is that it allows you to import everything back in the same way. If you have another instance up and running, log into the admin interface and upload all of the exported content that you have. Nice and easy!
Backing up the images on a Ghost blog
Now this is all good and well, but the eagle-eyed amongst you might have noticed that we haven’t actually downloaded any of the images associated with the blog. You might have restored all of the content to your new instance, but if you visit the pages on your site, you may notice that your images now point to broken links!
At the moment, the Ghost admin interface doesn’t let you download a copy of all of your images. Fortunately there is a way around this, although its a bit of a pain. All of the images for your Bitnami Ghost blog are located at ‘~/apps/ghost/htdocs/content/images’.
I switch between Windows and a Mac - so I used PSCP on a Windows machine for the command below. However, the command using SCP in linux is almost identical. I started by downloading all of the images on my blog to my local machine.
pscp -r -i C:\Users\dhume\Documents\xxx.ppk [email protected]:/home/bitnami/apps/ghost/htdocs/content/images C:\dean
Let’s break this down a little. Firstly, I am running the PSCP command and am linking to the .ppk file with my login credentials. Putty SCP uses PPK instead of PEM, but you can easily create one using the Putty tool. Next, point to the EC2 instance that I want to copy the images from, as well as the path to the images on the EC2 instance. The last parameter points to the folder on my local machine.
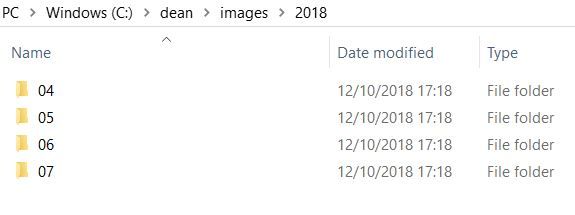
After running this command, I can see that all of the images have been downloaded to my local drive.
Restoring images on a Ghost blog
So far so good! Our images have been downloaded onto the local drive but we still need to upload them to the new EC2 instance. Using a similar command to the one we used above, I now need to flip the command and point to the new EC2 instance.
pscp -r -i C:\Users\dhume\Documents\xxx.ppk C:\dean\images\2018 [email protected]:/home/bitnami/apps/ghost/htdocs/content/images/
If all run successfully, you should now see the images on your site!
Removing the ‘manage’ banner on a Ghost blog (Bitnami)
If you spin up a new Bitnami Ghost instance, there are still a few things that you need to do before the site is ready to go ‘live’. On a completely fresh instance, you may notice a banner in the bottom right hand corner when you view your site in a web browser.

In order to remove this, you’ll need to SSH into your instance and run the following command in the terminal.
sudo /opt/bitnami/apps/ghost/bnconfig --disable_banner 1
If you refresh the page, you’ll notice that this has now been removed.
Updating the domain name on a Ghost blog
When you spin up a new Bitnami Ghost instance on EC2, you’ll be able to access it from the default domain that AWS assigns to it. However, you’ll want to point this to a real domain name and that involves updating a config setting in order for Ghost to link correctly.
In order to do this, you’ll need to SSH into your instance and run the following command.
sudo /opt/bitnami/apps/ghost/bnconfig --machine_hostname yourdomainname.com
It takes a little while to finish running, but this command will update your domain accordingly. Provided you’ve updated your DNS details with your hosting provider - when you visit the domain name on your website - all links will now be in working order.
I have sometimes found that the command above appends a :80 port number to the end of the domain name. This can mess with RSS feeds and links. In that case, you can always directly edit the values in the config.production.json file using the following command:
sudo nano /opt/bitnami/apps/ghost/htdocs/config.production.json
Updating a Ghost blog to the latest version
Considering Ghost is completely open source and built largely by the community, it’s pretty impressive to see the number of updates that they constantly ship. If you log into the admin section of your Ghost blog, and click on About - you should notice something a little like the image below.

The Ghost admin interface intelligently lets you know that you are on an older version and what new features are available if you update. Not surprisingly, updating it easier than you think.
Start off by SSH’ing into your instance and navigate to /apps/ghost/htdocs. Next, you’ll need to run the following command.
sudo ghost update
If everything runs successfully, you’ll have the latest version of Ghost up and running!
Stopping and Starting Ghost again
I have noticed a few instances where you suddenly encounter a 503 error when you are running an Amazon Micro instance. This could be caused due to having low memory on the instance and Ghost struggles with this. I find that a quick stop and start of Ghost should sort this problem out too.
sudo /opt/bitnami/ctlscript.sh stop
sudo /opt/bitnami/ctlscript.sh start
Summary
That’s about it. I hope that this article has been helpful to you. As I experiment with Ghost and make changes to this blog, I will be sure to keep it updated. Hopefully this serves to help you, but as a reminder for myself in case this happens again!