A Basic Guide to Building Chrome Extensions

Google Chrome has come a long way since it's early days. I am a big fan of the Chrome Developer tools and use it in my day to day development. There are also loads of great tools and extensions that are on offer at the Chrome store, and most are available to download for free.
Depending on your requirements, creating a Chrome extension is really quick and easy - all it requires is a little knowledge of JavaScript and HTML. In this post, I am going to run through a tutorial that shows you how to create a small Chrome extension that allows you to display the top 5 posts on this blog from the RSS feed in a popup. It is a pretty basic example, but will give you a good understanding of Chrome extension development.
In order to build an extension, the main starting point is the Manifest.json file. This contains all the configuration settings and will be used when your extension is loaded into the browser.
From the code above, you can see that I am setting the name of the extension as well as the icons, titles, and description. All these values will get used by the browser when the extension is loaded up.
Next, let's create our popup page. This can be done using standard HTML and easily allows you to add CSS styling and JavaScript to the page. Notice how this page (feed.html) is the same page that we referenced in the Manifest.json file.
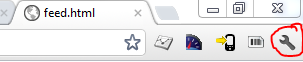
I used a little piece of code that is supplied by Feedburner.com to add a small feed on any website. Once this was in the page I was ready to upload the changes and test it out! In order to upload your newly created extension, click on the settings icon in the browser.
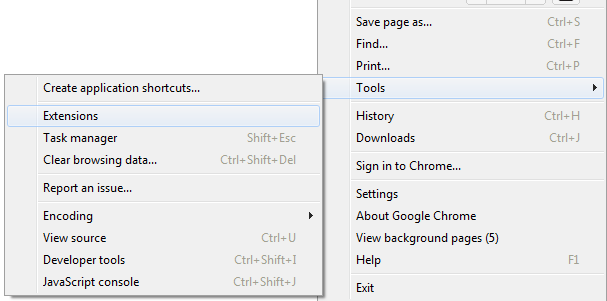
Then choose Tools -> Extensions
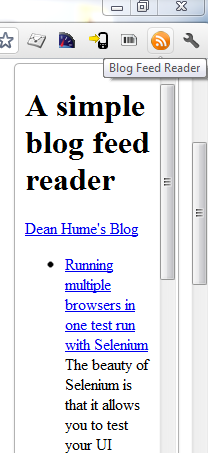
Next 'Load Unpacked Extension' - this will allow you to load your extension in the folder that it was created. It will look for the Manifest.json file and the feed.html file that it references. If you look in the top right hand corner of the browser, you should notice your new icon!

Now when we open it, it doesn't look that great - it could do with some CSS styling.
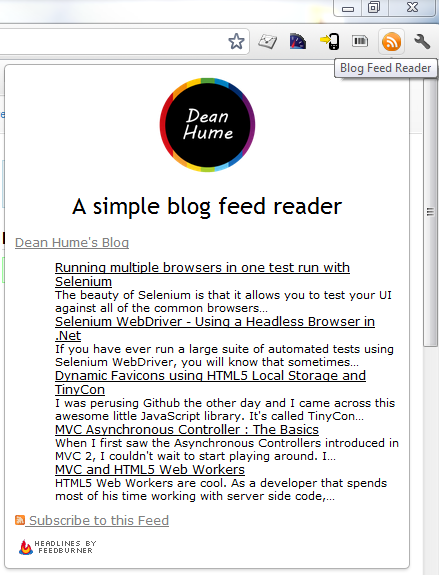
We can simply add this to the HEAD tag on the feed.html page.
Which then looks like this:
And that's it! In order to see the many features that are available - check out the Chrome Developer website. If you come across any issues while creating these extensions, I always find it really useful to use the Chrome Developer Tools to inspect the code for any errors. In order to do so, right click on your extension and choose 'Inspect pop-up'. This will give you easy access to debug your code.

In order to download the example created in this post, please click here. For other great Chrome extension samples to get you up and running, visit the Chrome Developer site.
I have also created a basic extension that is available on the Chrome store, it allows you to easily create QR Codes and Barcodes in a handy extension - it is available to download here.